Windows Server Setup
User Setup
We need to first setup a user that can use the VPN once running. To do this:
- Open the Server Manager.
- Go to Tools->Active Directory Users and Computers.
- Right click on the user and select Properties.
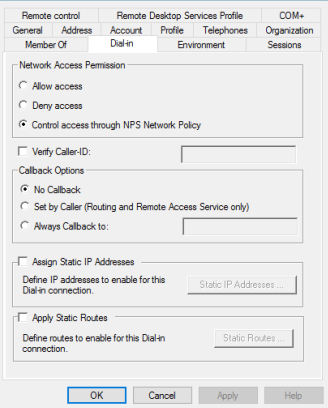
- Select the Dial-In tab and select “Allow access”.
Add Roles and Features
Now we need to enable the server to run a VPN.
- Open the Server Manager.
- Click on Manage->Add Roles and Features.
- Click Next.
- Select “Role-based or feature-based installation” and click on Next.
- Select “Select your server from the server pool” and click on Next.
- Select “Remote Access” and click on Next.
- Click Next.
- Click Next.
- Select “DirectAccess and VPN (RAS)” and Routing. Once it is selected a pop up will be shown and click on “Add Features”.
- Keep clicking Next until you get to the final screen where you need to click Install.
Configuring Remote Access and Routing
- Open Server Manager -> Tools ->Routing and Remote Access.
- Right click on your server name and click on “Configure Routing and Remote Access”.
- The “Routing and Remote Access Server Setup Wizard” will now open. Click Next.
- Select Custom configuration and click on Next.
- Select “VPN access” and NAT and click on Next.
- Click Finish.
- Click “Start Service”.
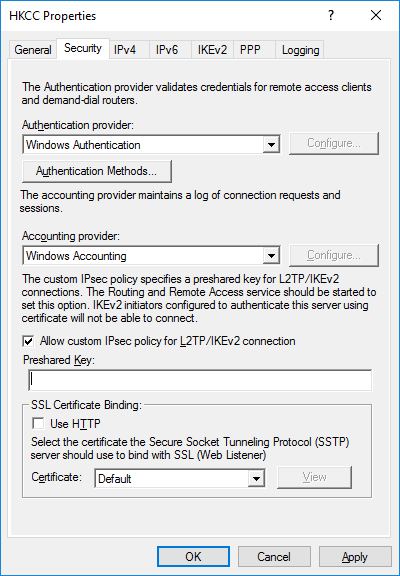
- Right click on your server and click on Properties.
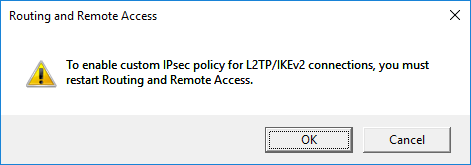
- Navigate to Security tab and select Allow custom IPsec policy for L2TP/IKev2 connection. Set “Accounting Provider” to “Windows Accounting” and check the “Allow custom IPSec policy for L2TP/IKEv2 connection”. Enter a 32+ digit key.
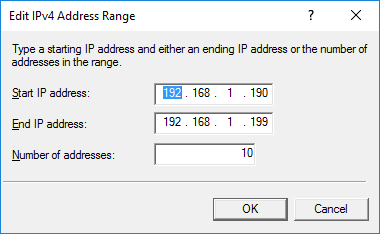
- Navigate to IPv4 and select “Static address pool”. The address range you enter here refers to the internal addresses that will be allocated to VPN clients.
- Click OK.
- Click OK.
Configure NAT
- Right click on NAT by navigating to Routing and Remote Access ->VPN (server name) ->IPv4->NAT and click on “New Interface…”.
- A new screen will be opened and select the NIC that connects to the internet. Click OK.
- Select “Public interface connected to the Internet” and select “Enable NAT on this Interface”.
- Open Services and Ports tab select “VPN Gateway (L2TP/IPsec – running on this server)” from the list.
- Edit Private address variable from 0.0.0.0 to 127.0.0.1 and click on OK.
- Click OK,
- Right click on your server and navigate to “All Tasks” and click Restart.
Windows Firewall
- Open Control Panel->System and Security->Windows Firewall->Advanced Settings.
- Go to “Inbound Rules”.
- Create a new rule by clicking on “New Rule…” in the right menu.
- Select “Predefined: Routing and Remote Access” and click Next.
- Select Routing and Remote Access (L2TP-In) and click on Next.
- Click Finish.
- The new rule should now be visible at the top of the “Inbound Rules”.
- Reboot the server.